
🎥 How to Add Smooth Transitions in CapCut (Complete Step-by-Step Guide for 2026)
If you’ve ever wondered how professional editors make their videos flow so smoothly — where one clip blends into the next without any awkward jumps — the secret lies in smooth transitions. In CapCut, transitions can completely transform your video editing game, turning basic clips into cinematic sequences.
Whether you’re making a travel vlog, aesthetic reel, or slow-motion montage, learning how to add smooth transitions in CapCut is one of the most important editing skills you can master.
In this in-depth guide, we’ll explore:
- ✅ What transitions are and how they work in CapCut
- ✅ Step-by-step tutorial (mobile + PC)
- ✅ The best smooth transition styles for 2025
- ✅ Advanced tips for professional-level results
- ✅ Common mistakes to avoid
- ✅ FAQs answered by experienced editors
Let’s dive right in 👇
🎬 What Are Transitions in CapCut?
In video editing, a transition is a visual effect that connects two clips smoothly. It can be a simple fade, a slide, a zoom, or even a complex 3D movement. Transitions control how one clip leaves the screen and how the next clip enters.
CapCut offers dozens of built-in transitions, ranging from cinematic to trendy TikTok-style effects — all designed to make your edits flow naturally. You can apply them between clips, within overlays, or even manually using keyframes.
📱 How to Add Smooth Transitions in CapCut (Mobile Tutorial)
Let’s start with the CapCut mobile app, since that’s where most creators edit their videos.
Step 1: Create or Open a Project
- Launch CapCut on your Android or iPhone.
- Tap New Project.
- Select 2 or more clips you want to edit, then tap Add.
Your clips will appear on the timeline in sequence.
Step 2: Locate the Transition Point
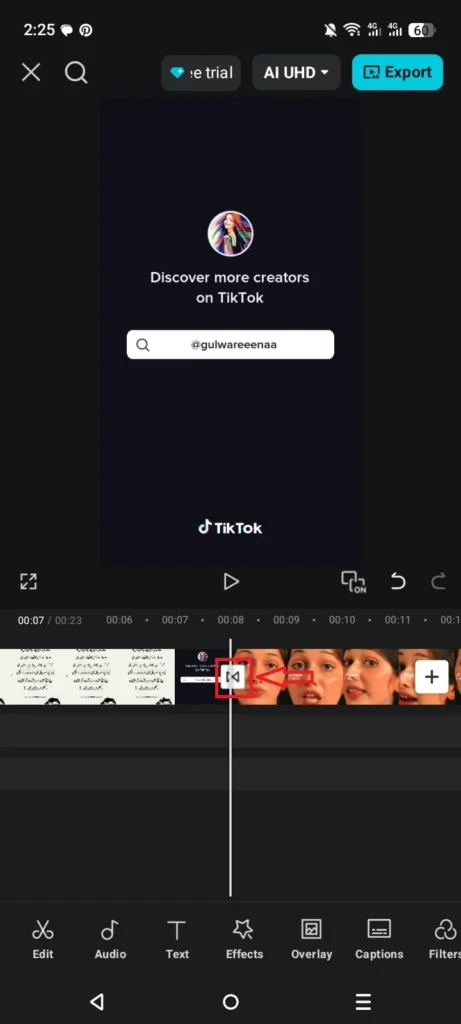
- On your timeline, look between two clips.
- You’ll see a small white square box with a “|>” symbol.
- Tap this box — it opens the Transition Menu.
Also check out: CapCut Lip Sync Not Working? Here’s How to Fix It (2026 Guide)
Step 3: Choose a Transition Effect
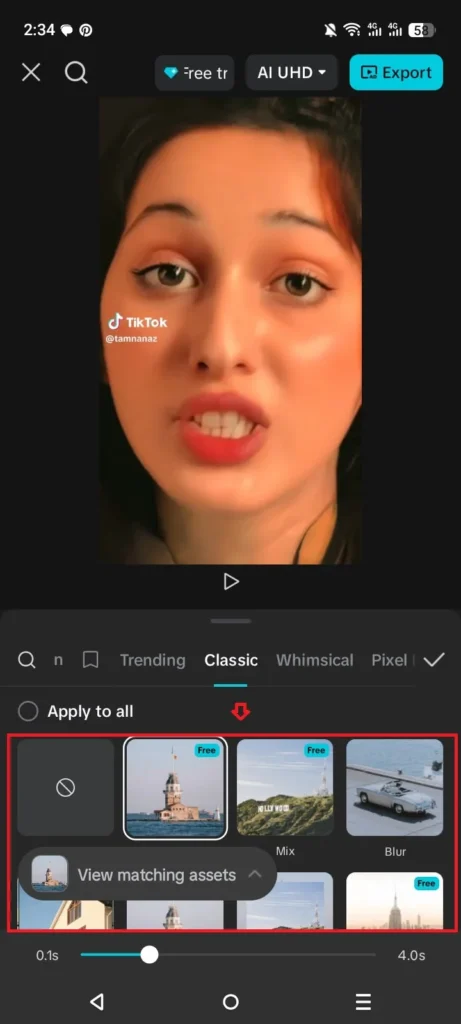
You’ll see several transition categories. Let’s break them down:
🔹 Basic
Includes Fade, Slide, Wipe, Zoom, and Cross Dissolve — perfect for smooth, cinematic transitions.
🔹 Camera
Includes Spin, Swing, Shake, and Pull In/Out — adds motion and energy to your videos.
🔹 Effect
Includes Blur, Flash, Glitch, and Distortion — best for modern edits or beat-sync videos.
🔹 3D
Includes Flip, Ripple, Cube, and Page Turn — perfect for creative transitions in reels or travel edits.
🔹 Overlay
Transitions designed for overlay layers, such as text or picture-in-picture clips.
Step 4: Adjust Duration and Preview
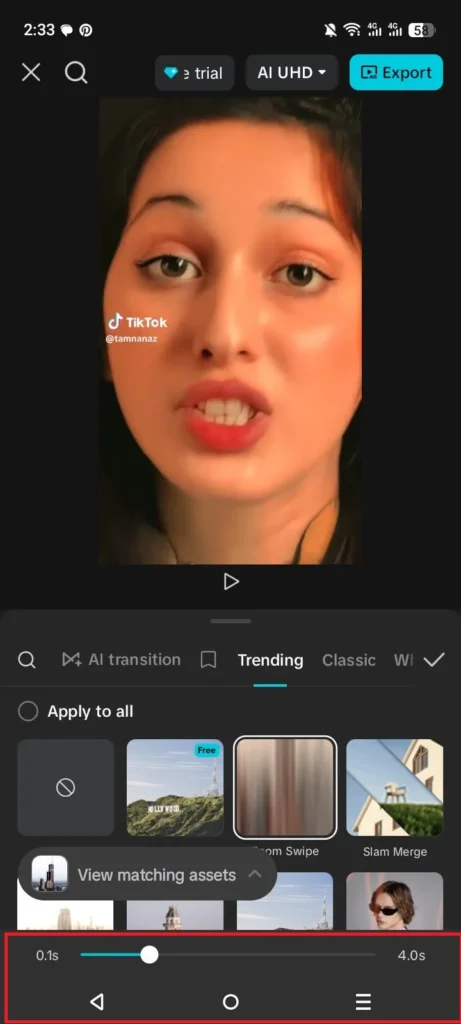
Each transition can be customized:
- Drag the duration slider to set how fast or slow it plays.
- For smooth results: use 0.8 – 1.2 seconds.
- Tap Play to preview it in real time.
- Tap the ✅ checkmark to apply.
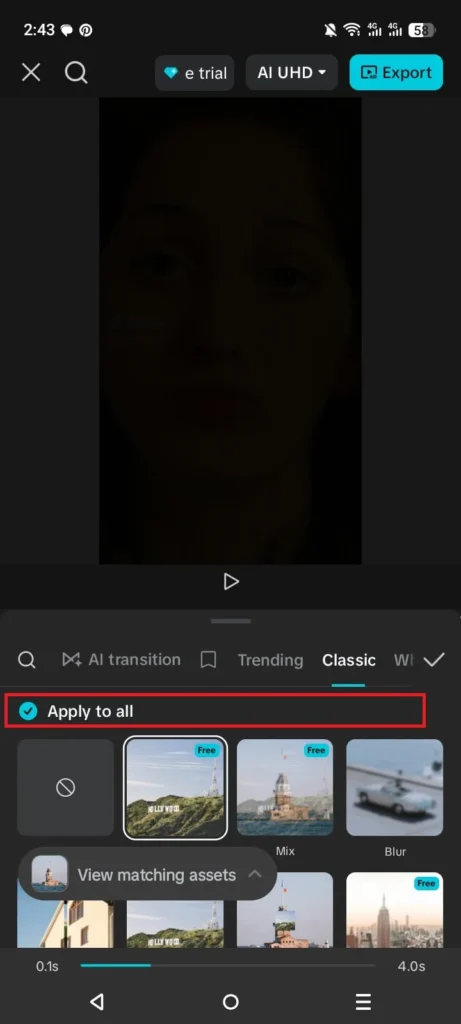
Step 5: Add Transitions Between All Clips
You can repeat the same process between all clips or:
- Long-press on a transition and tap Apply to All (for uniform transitions).
💻 How to Add Transitions in CapCut for PC (Desktop Version)
If you’re editing on a computer, the steps are similar but with more control.
- Open CapCut Desktop and import your video files.
- Drag and drop clips into the timeline.
- On the top-left, click Transitions.
- Browse available styles (Basic, 3D, Camera, Glitch, etc.).
- Drag your chosen transition between two clips.
- Adjust the duration using the slider.
- Preview and fine-tune for smooth flow.
The desktop version also supports custom keyframe transitions, where you can animate scale, rotation, or opacity manually for total creative freedom.
🌟 Best Smooth Transitions in CapCut (2025 Update)
Here are the most popular and professional-looking transitions trending this year among creators:
| Transition Name | Style | Perfect For | Description |
|---|---|---|---|
| Fade | Classic Smooth | All types of videos | Creates a natural dissolve between clips |
| Zoom In/Out | Dynamic | Travel, vlogs | Simulates camera movement |
| Motion Blur | Cinematic | Slow-motion scenes | Adds realistic motion smoothing |
| Camera Spin | Trendy | Reels, TikToks | Spins one clip into another stylishly |
| Blur In/Out | Aesthetic | Emotional edits | Fades clips softly with blur |
| Pull In / Pull Out | Professional | Music videos | Gives a professional zoom camera feel |
| Glitch Flash | Creative | Beat-sync edits | Adds electronic effect with rhythm |
🧠 Advanced Editing Tips for Professional Transitions
Once you know the basics, it’s time to take your transitions to the next level. Here’s how to make them look more professional:
1. Match Motion Between Clips
If one clip moves left to right, start the next clip with the same motion. This maintains continuity and makes transitions feel natural.
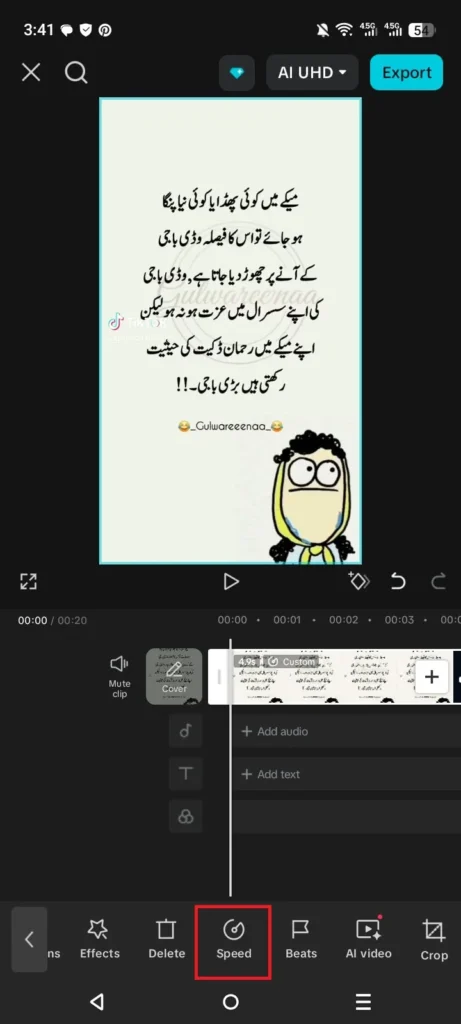
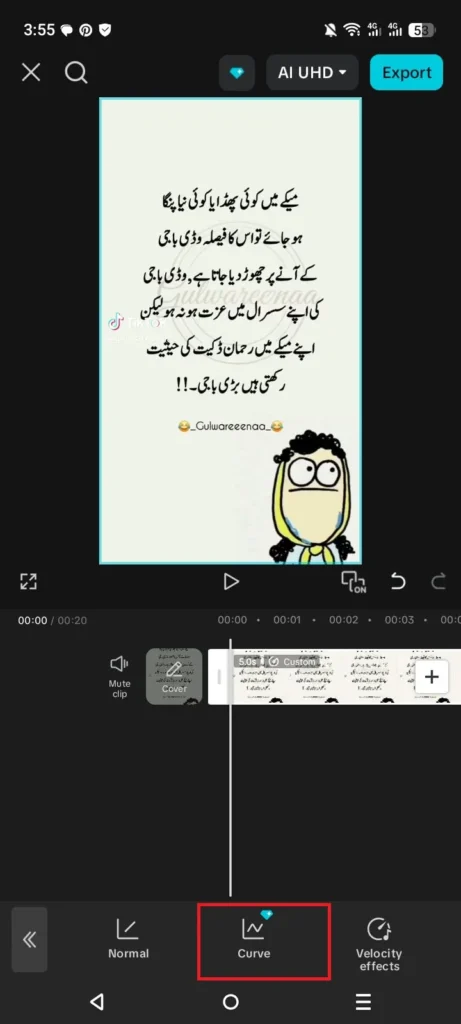
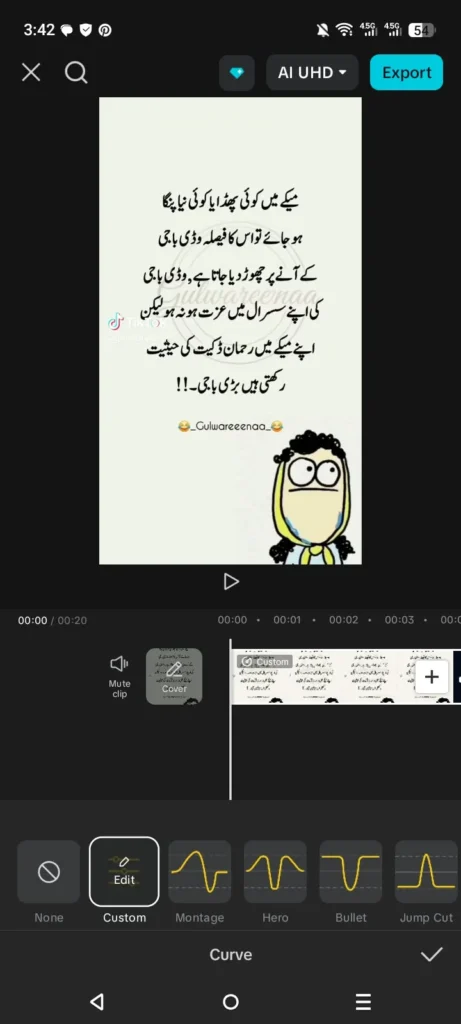
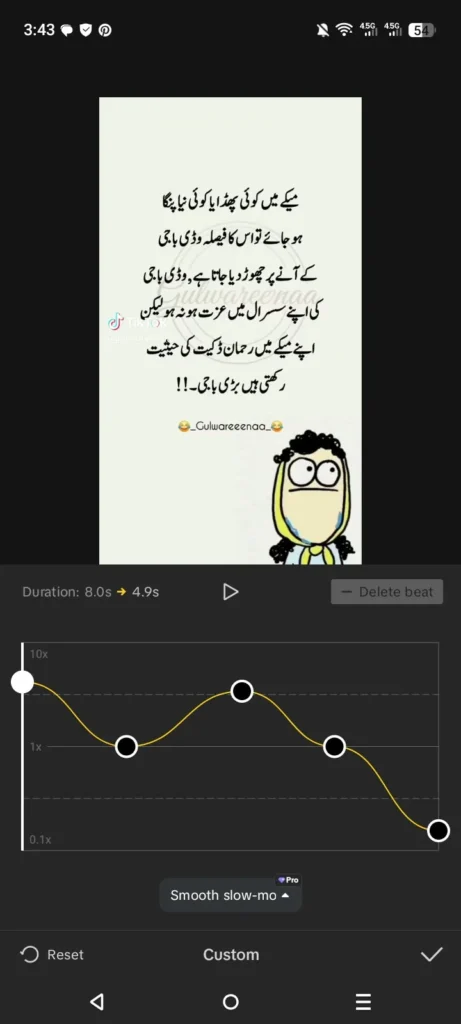
2. Combine with Velocity Edits
Use CapCut’s velocity curve feature to slow down or speed up parts of your clips around transitions. This adds cinematic rhythm.
3. Add Motion Blur Manually
If a transition looks too sharp, go to Effects → Video Effects → Motion Blur to make it more fluid.
4. Use Sound Effects (SFX)
A subtle “whoosh” or “swipe” sound enhances the impact of your transitions. CapCut has a built-in Sound Effects tab for this.
5. Sync with Music Beats
Use CapCut’s Auto Beat Sync tool to detect beats in your music track. Then place transitions on each beat for a dynamic flow.
6. Add Overlay Transitions
Add overlays like lens flares, light leaks, or smoke effects between clips. Change their blending mode to “Overlay” for smooth visual transitions.
⚠️ Common Mistakes to Avoid
Even skilled editors sometimes overdo transitions. Avoid these mistakes to keep your video professional:
- Using too many transitions — It makes the video look messy.
- Mixing random styles — Stick to 2–3 consistent transitions per video.
- Ignoring clip direction — Always match the motion direction of clips.
- Forgetting audio sync — Unsynced transitions can ruin the rhythm.
- Ignoring preview lag — Lower preview quality to ensure smooth playback.
🧰 Bonus: Create Your Own Custom Transitions in CapCut
Want to go beyond built-in transitions? You can create your own using keyframes!
Here’s how:
- Select your clip and tap Animation → Keyframe.
- Add one keyframe at the start and another at the end.
- Change Scale, Rotation, or Position slightly.
- Preview — the motion between these points becomes your custom transition.
- Save it as a template for future use.
This method gives you total creative control — you can make unique camera movements, zoom-ins, or rotation-based transitions that no one else has.
📦 Pro Editor’s Workflow Example
Here’s how professional editors combine effects in CapCut for smooth transitions:
| Step | Tool | Result |
|---|---|---|
| 1 | Trim clips tightly | Avoids jump cuts |
| 2 | Add Fade or Zoom transition | Smooth connection |
| 3 | Apply Motion Blur | More cinematic |
| 4 | Add sound “whoosh” | Realistic feel |
| 5 | Sync with beat | Perfect timing |
Repeat this across your timeline, and your edit will instantly look like a high-end YouTube or Instagram reel.
❓ Frequently Asked Questions (FAQs)
Q1. How do I make my transitions smoother in CapCut?
Use slower transitions (around 1 second), match camera motion between clips, and enable motion blur.
Q2. What’s the difference between Fade and Dissolve?
Fade darkens one clip before bringing the next, while Dissolve blends both clips together seamlessly.
Q3. Why are my transitions lagging or not exporting properly?
It could be due to low device memory or high preview quality. Try clearing cache or exporting in 1080p instead of 4K.
Q4. Can I use transitions on overlays and text layers?
Yes, CapCut allows transitions on overlays and text. Select the layer → tap Animation → In/Out → choose a transition style.
Q5. Are transitions available in the CapCut web editor?
Some basic transitions like Fade and Zoom are available, but advanced ones (like 3D Spin) are mobile-only as of 2025.
Tested on CapCut Mobile v19.5.0 · Android · 6 Oct 2026. Desktop-app screenshots skipped — CapCut Desktop can’t run on this laptop.


