
How to Add a Distortion Effect in CapCut (2026 Complete Guide)
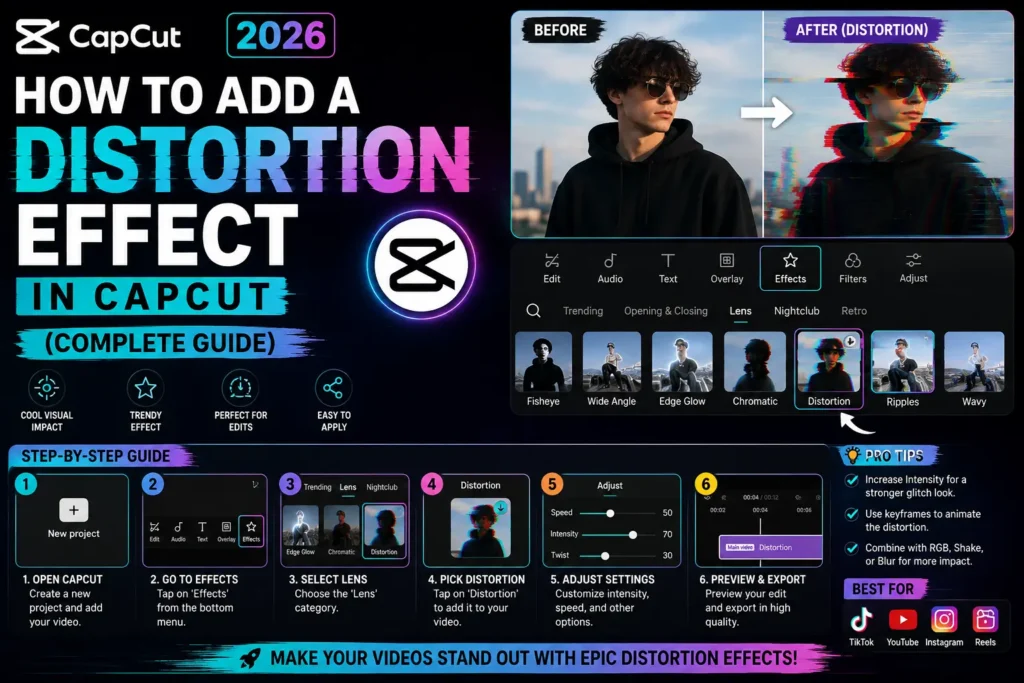
Distortion effects — warping, glitching, ripple, fisheye, RGB color-split — give footage a surreal, digital-malfunction, or dreamlike look, and CapCut has enough built-in tools to create a genuinely effective one without external VFX software.
What a Distortion Effect Actually Involves
Warping of lines, shapes, or the overall image (ripple, wave, fisheye), glitch/pixelation/digital-shift artifacts, or displaced/textured overlays simulating corruption or a surreal moment. It communicates a specific feeling depending on style: glitch reads as digital/tech, warp reads as dream or hallucination, ripple reads as water or shock.
Best used for: transitions, dramatic reveals, music video cuts, or horror/tech-themed content — generally short, high-impact moments rather than a sustained effect over a whole clip.
Step 1: Import and Position Your Clip
New Project → import your footage → place it on the timeline and decide exactly where the distortion should land — a beat drop, a transformation moment, or a transition point tends to work far better than an arbitrary spot.
Step 2: Apply a Distortion-Style Effect
- Select the clip → Effects → Video Effects.
- Browse categories like Glitch, Distortion, Retro, or Lens (these are often grouped together) — look for options like Digital Distortion, Wave Distortion, Ripple Distortion, or Fisheye.
- Apply the effect, then trim its duration — short segments, roughly 0.3-1.0 seconds, are almost always more effective than applying distortion across a longer stretch of footage. A brief, punchy distortion reads as intentional; a long one reads as a mistake.
Step 3: Fine-Tune the Parameters
Open Adjust/Effect Settings after applying the effect and dial in:
- Intensity/Strength — how dramatic the warp is
- Speed/frequency — how fast the distortion pulses
- Blur/displacement — if available for the specific effect
Use keyframes to animate intensity rather than applying a flat, constant value: start at 0%, peak at 100% right at your visual or audio cue (a beat, a reveal, a cut), then fade back to 0%. This shape reads as far more deliberate than a static distortion held for the same duration.
Step 4: Layer On Additional Elements for More Impact
- Add an overlay of noise, scrambled-pixel texture, or an RGB-split effect, with the blend mode set to Screen, Overlay, or Lighten and opacity around 30-60% so it blends rather than dominating.
- Pair with a camera shake or lens distortion effect at the same moment to accentuate the sense of movement.
- Add a sound effect (impact, glitch, rewind) timed to the same instant — pairing the visual distortion with an audio cue makes the moment land noticeably harder than either alone.
Step 5: Color Grade and Export
Grade the clip to match your intended mood — higher saturation and contrast for a punchy digital feel, a blue/green tint for a tech aesthetic, red for horror. Export at 1080p or higher, 30-60fps, with a high bitrate — distortion effects are more prone to visible compression artifacts than normal footage, so a low bitrate can undo the clean look you built. Preview on your actual target platform before finalizing, since a distortion that looks smooth in the editor can appear jittery after platform compression.
Creative Variations Worth Trying
- Combine with a speed ramp (slow to fast, or the reverse) for a time-warp or shock-effect feel.
- Mask the effect to only part of the frame — applying distortion to just the background while keeping a subject clean (or vice versa) is often more effective than distorting the entire frame uniformly.
- Add chromatic aberration or RGB color-split alongside the warp for a more futuristic-glitch specific look.
- Use CapCut’s own distortion-named templates as a starting point, then swap in your own media and adjust settings rather than building entirely from scratch.
- For scenic footage (water, sky, space), a slower, continuous warp can simulate fluid motion rather than reading as a glitch — a different effect from the short punchy version described above.
Common Problems
| Problem | Cause | Fix |
|---|---|---|
| Distortion looks choppy or stutters | Duration too long, or exporting at a low frame rate | Shorten the effect, export at a higher fps |
| Warped subject looks unnatural | Distortion applied uniformly across the whole frame including the subject | Mask the subject out, or apply distortion to the background only |
| Effect overwhelms the content | Intensity or overlay opacity too high | Lower the intensity, reduce overlay opacity |
| Odd color artifacts or outlines | Color-split/glitch pushed too far without refinement | Tone down chromatic aberration, refine the mask edges |
| Detail lost in the exported video | Export resolution or bitrate too low | Export at higher resolution and bitrate |


