How to Use Chroma Key in CapCut: Complete Green Screen Editing Guide
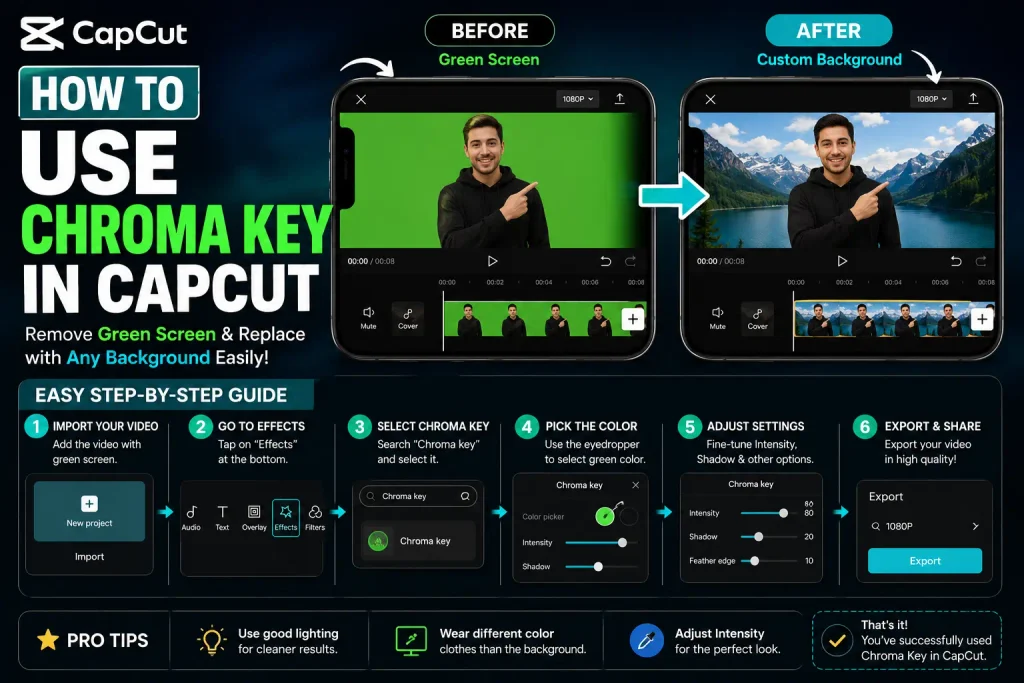
Chroma key in CapCut editing — removing a solid-colored background and replacing it with something else — used to require software like After Effects or Premiere Pro. CapCut brings a workable version of this to your phone or PC for free, and it’s more approachable than it sounds once you know where the controls live. This guide covers preparing footage, applying the effect, and the fine-tuning that separates a clean key from an obvious one.
What Chroma Key Actually Does
Chroma key removes a specific color — usually green or blue — from your footage and replaces it with another image, video, or graphic. It’s the technique behind placing a facecam over gameplay footage, adding effects like fire or smoke from green-screen clips, or dropping yourself into a different scene entirely. CapCut handles this without requiring manual masking or layer work.
CapCut’s version is worth using over more complex tools specifically because it runs on both mobile and desktop, includes real-time preview so you can see the key update as you adjust it, and gives you enough manual control (strength, shadow, edge smoothing, brightness) to fix the rough edges that make a green screen look obviously fake.
Step-by-Step Guide
1. Prepare your green screen footage. You’ll need a clip filmed against a solid, evenly lit background — green or blue both work, but avoid shadows or creases in the backdrop. Wear clothing that doesn’t match the background color, keep some distance from the screen to avoid color reflecting onto you, and film in 1080p or 4K if possible for a cleaner key. If you don’t have your own footage, green-screen effect clips are available on YouTube and stock sites like Pexels, Pixabay, or Videvo.
2. Start a new project and layer your clips. Open CapCut, start a new project, and import your background clip (gameplay footage, a scene, whatever you’re compositing onto). Add your green screen clip on top using the Overlay option — you should now have two layers: the background on the base layer, and your green-screen footage on the overlay.
3. Apply the Chroma Key effect. Tap your overlay clip, find the Chroma Key option in the toolbar, and use the color picker to select the background color you want removed. CapCut will make that color transparent, and your overlay should immediately appear composited over the background.
4. Fine-tune the key. This is the step that actually determines whether it looks professional. Strength controls how aggressively the color is removed — increase it if background color is still visible, but go too far and it starts eating into your subject. Shadow adds a soft shadow beneath your overlay to help it feel grounded rather than floating. Edge smoothing cleans up the harsh outline or pixelation that’s common right at the boundary of your subject. Brightness lets you match your overlay’s exposure to the background it’s sitting on. Small adjustments across these four settings matter more than any single big change.
5. Reposition and resize. Drag the overlay wherever it needs to go — a corner for a facecam, centered for a reaction video — and resize it to fit. CapCut’s keyframe tool lets you animate the overlay’s position or scale over time, which is useful for something like zooming in on a facecam during a highlight moment.
6. Add finishing touches. A light drop shadow, a filter or color grade to match the overlay’s tone to the background, a smooth transition on entry, or text and graphics near the overlay can all add polish. CapCut supports stacking multiple overlay layers, so a common setup is a facecam, a logo overlay, and a green-screen effects clip (like fire or lightning) all layered on the same base.
Getting a Clean Key
A few things matter more than the rest: lighting the background evenly and separately from your subject (two soft lights if you have them), avoiding clothing that’s close to your background color, and correcting green fringing around edges by increasing strength slightly and reducing shadow rather than the reverse. If your overlay looks like it’s floating, that’s usually a missing or mismatched shadow — CapCut’s shadow control is there specifically to fix that. And if you want your overlay to move or react rather than sit static, keyframing scale and position is the tool for that.
Practical Uses
The most common use is a facecam layered over gameplay footage, with opacity adjusted slightly for a more blended look. Green-screen effect clips (explosions, particles, lightning) work the same way and are useful for punching up highlight moments in a montage. Chroma key also works well for product or tutorial videos where you want a clean studio or digital backdrop behind you, and for inserting yourself into existing scenes or meme templates. For gaming creators specifically, this is also how commentary overlays and live-reaction facecams over matches typically get built.
Exporting
Tap Export, choose your resolution (1080p or 4K), and set your frame rate — 60fps tends to look smoother for gaming or action content. For gaming or cinematic footage, a higher bitrate (roughly 10–15 Mbps) helps preserve detail. From there you can save locally or share directly to YouTube, TikTok, or Instagram.
Common Mistakes to Avoid
Uneven lighting on the background is the single most common cause of a patchy key — consistent, soft lighting fixes most of it. Wearing clothing close to your background color will get partially keyed out along with the background, so switch screens or outfits rather than trying to fix it in post. Harsh edges usually mean the edge-smoothing setting needs a bump and strength needs to come down slightly, not the other way around. An overlay that looks too bright or doesn’t match its background usually needs a brightness adjustment or a matching filter. And skipping the shadow setting is the most common reason an otherwise well-keyed overlay still looks pasted-in rather than composited.