🎬 How to Add Cinematic Color Grading in CapCut (Mobile & PC Guide)
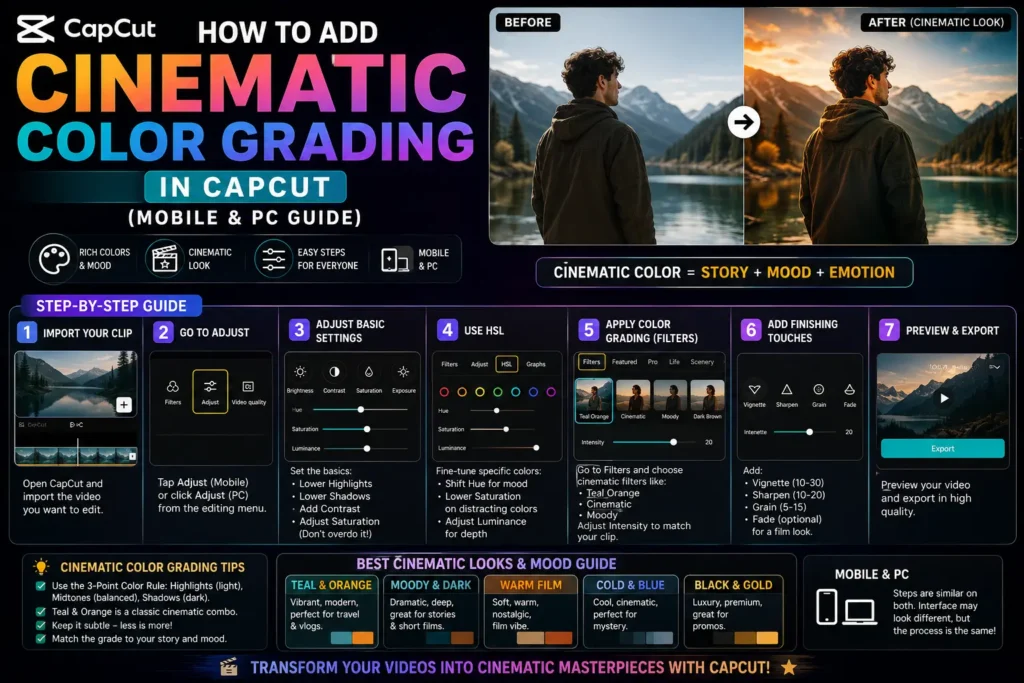
Looking for a simple way to add cinematic color grading in CapCut? You’re in the right place. In this guide, we’ll show you how to give your videos that professional movie-style look using CapCut on both mobile and PC. Whether you’re a beginner or a seasoned video editor, this tutorial will help you achieve stunning visuals that boost engagement and make your edits go viral.
🌈 What Is Cinematic Color Grading?
Color grading is the process of adjusting and enhancing colors in a video to create a specific mood, tone, or atmosphere. In movies, this process defines the entire emotional feel of a scene.
Here’s how different color styles affect your videos:
- Warm tones → Cozy, nostalgic, or romantic scenes
- Cool tones → Dramatic, moody, or sci-fi feel
- Teal & Orange look → Most popular cinematic style used in Hollywood
With CapCut , you can achieve these effects effortlessly—without needing expensive software like DaVinci Resolve or Adobe Premiere Pro.
📱 How to Add Cinematic Color Grading in CapCut (Mobile)
Follow these easy steps to apply cinematic color tones on your mobile device:
- Open CapCut and import your video clip.
- Tap your video → select “Adjust.”
- Now tweak these settings for a cinematic tone:
- Brightness: -10 to -20
- Contrast: +20 to +30
- Saturation: +5
- Exposure: -10
- Temperature: Adjust warm or cool as per mood
- Go to Filters → Cinematic section, and try:
- Cinematic 1
- Warm Light
- Cool Film
- Adjust the filter intensity to around 60–70% for a natural look.
💡 Pro Tip: Add a subtle vignette and use slow motion for a professional, emotional impact.
💻 How to Apply Color Grading in CapCut (PC Version)
If you’re using CapCut Desktop (PC), you have even more control over grading:
- Launch CapCut on PC and import your footage.
- Select your video clip → open the Color tab.
- Adjust these controls:
- Curves: Smoothly adjust shadows and highlights
- HSL: Fine-tune individual colors like sky blue, greens, and skin tones
- Import LUTs (.cube format) for advanced grading:
- Go to Filters → LUT → Import LUT
- Try cinematic LUTs like:
- Kodak Vision3 LUT
- Teal & Orange Film LUT
- Vintage Cinema LUT
🎥 Pro Tip: Combine LUTs with CapCut transitions and cinematic background music for professional-grade results.
🎞️ Best Cinematic LUTs and Filters for CapCut
Want your video to look like a movie trailer? Try these top-rated LUTs and filters compatible with CapCut:
- Teal & Orange LUT – Perfect for adventure vlogs
- Moody Film LUT – Great for dramatic short films
- Dreamy Aesthetic LUT – Ideal for TikTok or Reels
- Vintage Cinema LUT – Adds a nostalgic tone
You can find these LUTs in the CapCut template library or import them from creators on YouTube and TikTok.
🧠 Pro Tips for Realistic Color Grading
- Avoid extreme saturation — keep it balanced
- Always preview your edit on multiple devices
- Match the color tone with the story and emotion of your video
- Save your favorite grading as a preset for future projects
- Add cinematic soundtracks for maximum impact