How to Stabilize a Video in CapCut: A Step-by-Step Guide
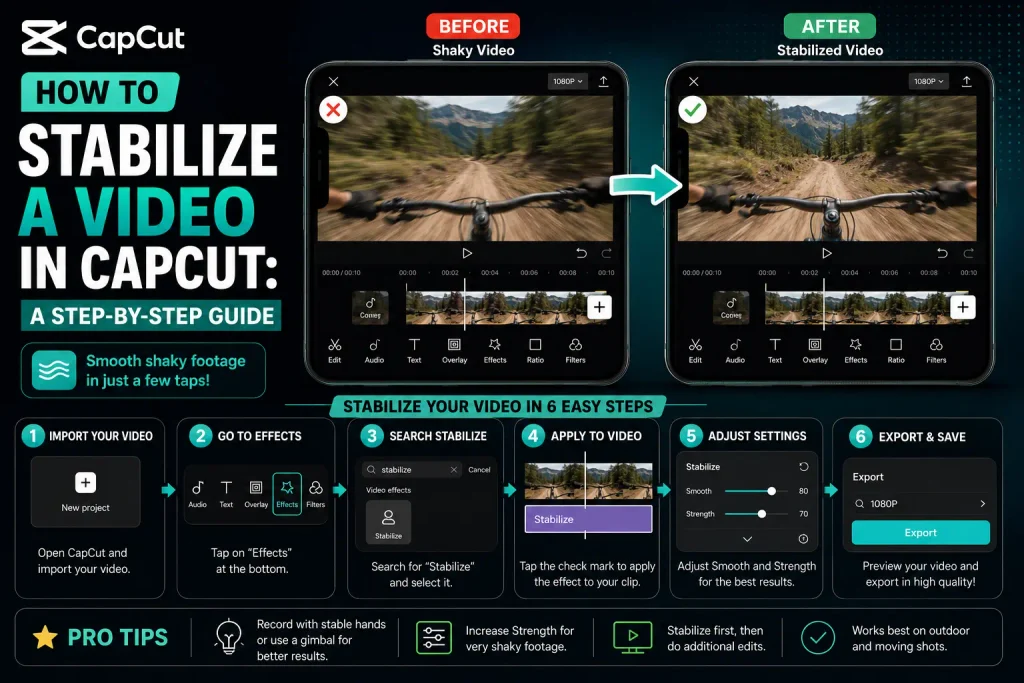
Shaky footage — from handheld shots, gaming screen recordings, or gimbal-free drone clips — tends to distract from whatever’s actually happening in the video. CapCut’s built-in stabilization tool handles most of this without needing separate software, and it works the same basic way across mobile, desktop, and the web editor.
[FILL IN: a real screenshot of the stabilization level options, or a note on which CapCut version this was last tested on]
What Stabilization Actually Does
It analyzes and adjusts frames to reduce unwanted camera motion — jitter, handheld shake, vibration — and smooths the result. It’s most useful for handheld or walking footage, action or sports recordings, gaming screen captures with sudden movements, and drone or phone footage shot without a gimbal. Beyond just looking more professional, stabilized footage is also easier to build on with overlays and effects later, since you’re not fighting a moving frame.
Stabilizing on Mobile
1. Import your video. Open CapCut, tap New Project, choose your shaky clip from your gallery, and add it.
2. Select the Stabilize tool. Tap the clip on the timeline, then find “Stabilize” in the bottom toolbar.
3. Choose a stabilization level. You’ll typically see three options: Minimal Crop (light stabilization, less zoom), Recommended (a balanced default for most footage), and Most Stable (the strongest effect, but crops more of the frame). CapCut will process and preview the result, which can take a few seconds depending on clip length.
4. Preview and adjust. If the result looks unnaturally smooth or “floaty,” or too much of the frame has been cropped away, drop down to a lighter stabilization level.
5. Export. Tap Export, choose your resolution (720p, 1080p, or 4K) and frame rate, then save or share directly.
Stabilizing on Desktop (Windows/Mac)
1. Import your video into a new CapCut Desktop project and drag it to the timeline.
2. Enable stabilization. Select the clip, then find the Stabilize option in the Video Properties panel and toggle it on.
3. Choose a level. The same three options apply — Recommended for typical handheld footage, Minimal Crop for lighter shake, or Most Stable for heavier shake. CapCut will process the clip; wait for it to finish before previewing.
4. Review and export. Preview the result, adjust if needed, then export with your preferred format (MP4 or MOV), resolution, and bitrate.
Desktop tends to be the better option for longer clips or 4K drone/action footage, since it generally handles heavier processing loads more comfortably than the mobile app.
Stabilizing on CapCut Web
1. Upload your video at CapCut’s online editor after starting a new project.
2. Apply stabilization. Select your clip, find Stabilize in the right-hand panel, and choose your level (Recommended, Minimal, or Most Stable).
3. Export and download once processing finishes, choosing your resolution, frame rate, and quality.
Best Practices
Starting with Recommended is a reasonable default — it balances smoothness against how much of the frame gets cropped. Over-stabilizing can make footage look unnaturally smooth or “floating,” so if the motion looks artificial, back off a level. Since stabilization crops in from the edges to compensate for shake, check that nothing important in the frame gets cut off — if it does, try a lighter level or reframe the shot before stabilizing rather than after. No stabilization tool fully substitutes for steady source footage, so a tripod, gimbal, or phone stand at the time of filming will always give you a better starting point than fixing it entirely in post. It’s also worth applying stabilization before adding transitions, overlays, or other effects, since stabilizing afterward can shift timing and misalign anything layered on top — and after stabilizing, double-check that audio, captions, and any overlays are still in sync, particularly for commentary or gaming content.
A couple of things worth knowing: stabilization doesn’t meaningfully reduce your video’s resolution, though it may crop the frame slightly to remove shake at the edges. And you don’t have to stabilize an entire clip — splitting off just the shaky portion and applying stabilization to that segment alone works fine if the rest of the footage is already steady.
Common Issues and Fixes
| Problem | Likely Cause | Fix |
|---|---|---|
| Stabilize option is greyed out | Outdated app version, or the clip isn’t properly selected | Update CapCut first; if it’s still unavailable, try re-selecting the clip or switching to the desktop or web version |
| Cropping too much of the frame | Using the “Most Stable” level | Switch to “Minimal Crop,” or reframe the shot before stabilizing |
| Footage still looks shaky | Heavy shake, or low-light motion blur in the source footage | Combine stabilization with a light motion blur effect, or reshoot with steadier support if possible |
| Slow processing | Large 4K files | Close background apps, or switch to CapCut Desktop for faster rendering |