
How to Add LUTs in CapCut: Step-by-Step Guide
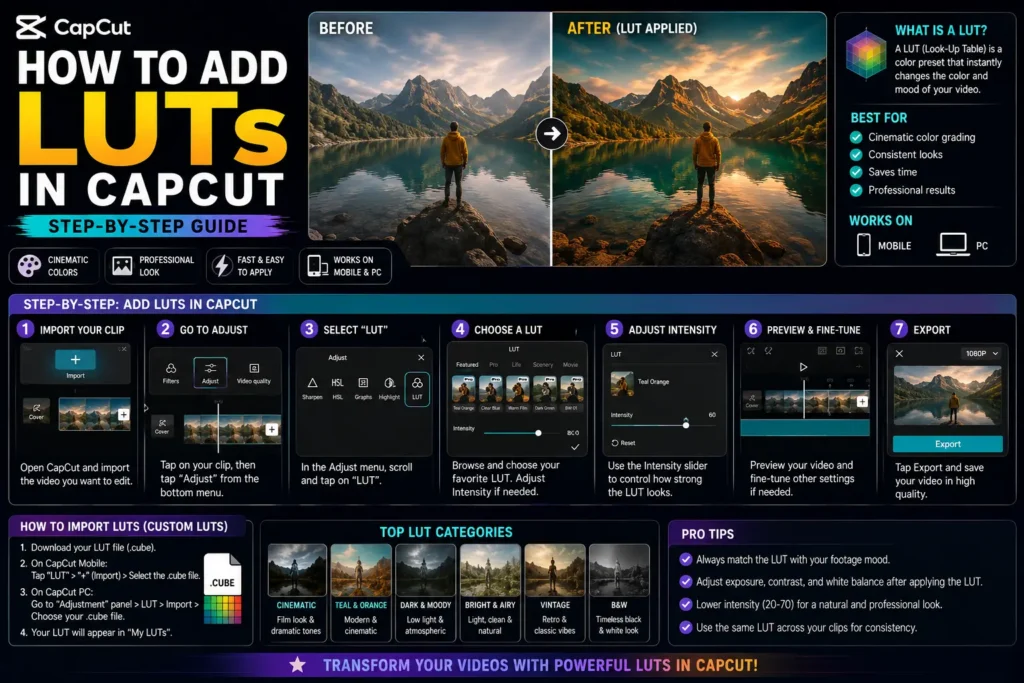
LUTs (Look-Up Tables) apply a predefined color grade in one step, instead of manually adjusting brightness, contrast, shadows, and saturation individually — a cinematic LUT can give footage a movie-like tone, a warm LUT enhances skin tones, a cool LUT creates a moodier feel.
One clarification worth making upfront: direct .cube LUT import is a CapCut Desktop feature — it’s not confirmed to require a specific paid tier, so don’t assume you need a subscription just to try it. If you hit a genuine paywall on your version, that’s worth confirming against your current account status rather than assuming it’s universal.
Why Use LUTs
- Faster professional-looking grading — one click instead of manually tuning several settings.
- Consistency across multiple projects, useful if you’re building a recognizable visual style.
- Cross-platform, though with meaningfully different capabilities between desktop and mobile (see below).
Adding LUTs on CapCut Desktop
- Open CapCut on PC and import your video to the timeline.
- Click Adjust above the timeline to open color grading controls.
- Import a custom LUT file (
.cubeformat) — browse to your LUT folder and select the one you want. It applies immediately to the selected clip. - Fine-tune after applying — a LUT is a starting point, not a finished grade. Adjust exposure, saturation, and contrast afterward to match your specific footage rather than leaving the LUT at its default strength.
Adding LUT-Style Looks on Mobile
CapCut’s mobile app doesn’t support direct .cube LUT import — this is a genuine platform limitation, not a bug or a hidden setting.
- Open your project on mobile → tap Adjust at the bottom.
- Use Filters or manual adjustments to approximate a LUT-style look.
- If you specifically need a real LUT’s exact look on mobile, you’d need to convert it to a filter format using a third-party tool first — this is a genuine workaround, not something CapCut mobile does natively, so treat it as an extra step rather than a built-in feature.
Getting the Most Out of LUTs
- Shoot in a flat/log color profile if your camera supports it — LUTs are specifically designed to work with this kind of flat, low-contrast source footage, and applying one to already-graded standard footage produces a much weaker or less predictable result.
- Pair LUTs with other techniques — transitions for cinematic pacing, overlays for music-video style, or green screen work for cleaner VFX compositing.
Common Issues
LUT won’t load. Confirm it’s genuinely in .cube format — other LUT file formats aren’t supported.
Colors look off or barely change anything. This is very often a source footage issue, not a LUT problem — check whether your footage was shot flat/log (LUTs are built for this) versus already color-graded or shot in a standard profile (where a LUT’s effect will be much subtler or look wrong).
LUT import not available on mobile. This is a genuine platform limitation as covered above — use filters/manual adjustment, or the third-party conversion workaround, rather than searching for a hidden mobile LUT-import feature that doesn’t currently exist.


