
How to EASILY Fix Bad Audio on Your Phone with CapCut (Complete 2026 Tutorial)
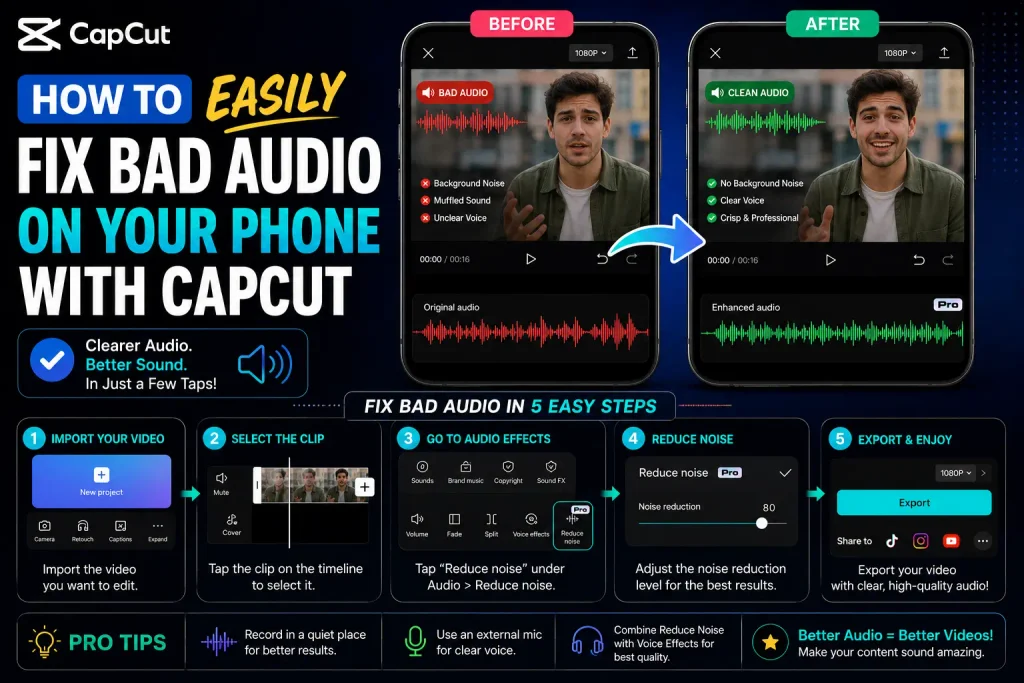
Bad audio undercuts a video faster than almost anything else — viewers tend to forgive rough visuals more readily than they forgive audio that’s hard to listen to. CapCut’s built-in audio tools can fix a lot of common mobile-recording problems directly on your phone, without needing separate software.
Why Audio Quality Matters as Much as Visuals
Clear, balanced audio keeps people watching even when the visuals are only average, and it’s a meaningful factor in retention — which in turn affects how platforms surface your content. Beyond the algorithm side of it, clean audio simply reads as more professional and makes later editing (adding music, captions, etc.) easier to get right.
Common Audio Problems on Mobile Recordings
The usual culprits: constant background noise (fans, traffic, wind), room echo or a hollow-sounding voice, muffled or unclear vocals, low volume or distortion, and an imbalance between voice and background music. CapCut’s tools can address most of these directly.
Step-by-Step Guide
1. Import and separate your audio. Open CapCut, start a new project, and import your video. Tap the clip and select Extract Audio — this separates your voice track from the visuals so you can work on it precisely without affecting the video.
2. Reduce background noise. Tap the audio track and choose Noise Reduction, then turn it on and adjust the intensity — lighter settings suit minor background sound, while heavier settings suit persistent wind or traffic noise. Preview as you adjust; pushing noise reduction too far tends to make voices sound thin or metallic, so it’s worth backing off if that starts happening.
3. Boost vocal clarity. Open the Equalizer and try a Vocal Boost or Voice Enhancement preset if one’s available. If you have manual control, adding presence in the vocal range — roughly 500Hz to 3kHz — tends to help intelligibility, though CapCut’s EQ interface may only expose broader presets rather than exact frequency control depending on version. Adjust overall volume so your voice sits clearly above any background sound.
4. Balance and smooth the mix. If you’re using background music, pulling it down to somewhere around 30–40% relative to your voice track is a reasonable starting point, with voice sitting noticeably louder — adjust by ear rather than treating these as fixed numbers. Adding a short fade in and out avoids harsh, abrupt audio transitions. Once you’ve made these adjustments, double-check that audio and video are still in sync.
5. Export and review. Export at 1080p or higher, then actually listen to the result on a few different devices — phone speakers, headphones, and a laptop all reveal different issues. If something still sounds off, go back into Noise Reduction or EQ and make smaller adjustments rather than large ones.
Recording Better Audio in the First Place
Editing can fix a lot, but it can’t fully substitute for a clean recording. A quiet environment goes further than any amount of post-processing. A clip-on or external mic will outperform a phone’s built-in mic in almost every case. Recording indoors with soft surfaces around you (curtains, carpet, cushions) reduces echo noticeably compared to a bare room. Keeping your mouth a consistent distance from the mic — roughly 20–30cm is a reasonable range — helps keep levels steady, and checking your levels with a short test clip before the real take catches problems before they’re baked into the recording.


