
🎥 How to Add Motion Blur Effect in CapCut (Smooth Transitions & Camera Movement)
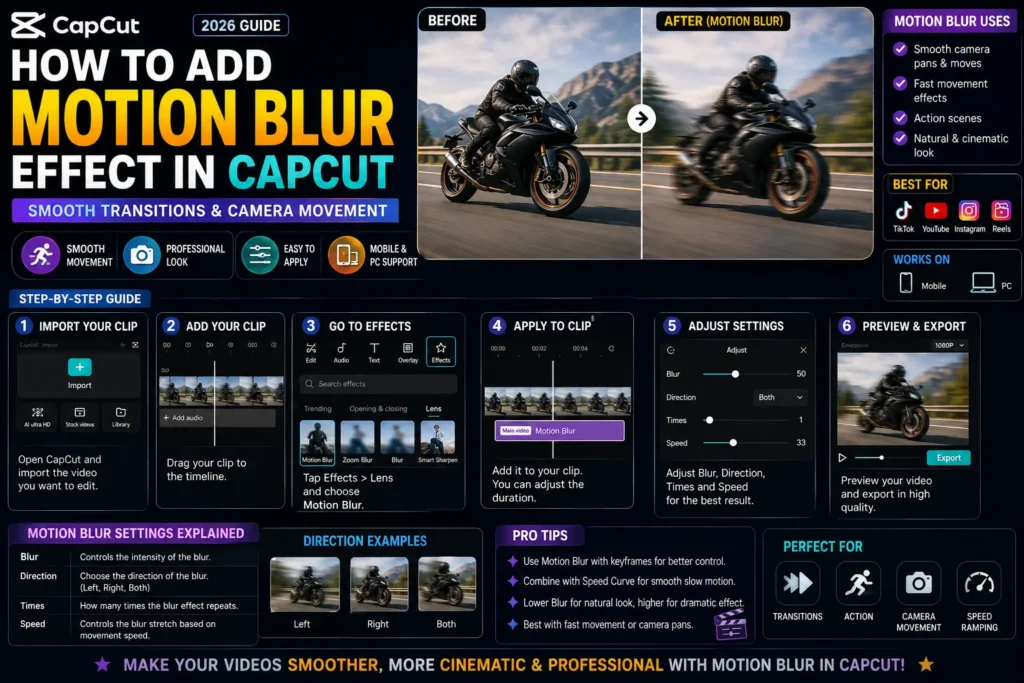
Ever noticed how professional videos have that smooth, cinematic motion that feels buttery and natural?
That’s because of the motion blur effect — a subtle trick that makes camera movements and transitions look more realistic and less robotic.
In this complete guide, you’ll learn how to add motion blur in CapCut, both on mobile and PC, to give your videos that professional “movie” look — perfect for action clips, travel vlogs, and music edits.
🌈 What Is Motion Blur?
Motion blur simulates the way our eyes naturally perceive fast movement.
When an object or camera moves quickly, it leaves a faint blur trail. This softens harsh transitions and adds a cinematic flow to your video.
Without motion blur → transitions feel abrupt or jittery.
With motion blur → they look smooth, dynamic, and natural.
If you’re just starting with CapCut, check out How to Add Smooth Transitions in CapCut to understand how motion complements transition
📱 How to Add Motion Blur in CapCut (Mobile)
CapCut mobile offers a built-in motion blur setting — here’s how to use it:
Step 1: Import Your Video
- Open CapCut → New Project
- Import your video or clips
Step 2: Enable Motion Blur
- Tap your video clip in the timeline
- Select “Motion Blur” (under Effects or Adjust tab depending on version)
- Turn it ON and adjust:
- Intensity: 40–60 (for smooth look)
- Range: 5–10 (controls blur spread)
Step 3: Add to Transitions
- To blur your transitions, tap the white box between clips → choose a Camera or Zoom transition → lower its sharpness → enable Motion Blur toggle if available..
💡 Pro Tip: Combine motion blur with slow motion (0.5x speed) for cinematic slow transitions. For deeper control, explore CapCut Speed Curve Editing to sync blur with beats.
💻 How to Add Motion Blur in CapCut (PC)
The desktop version of CapCut offers more precise blur control — great for professional edits.
Step 1: Import Your Footage
- Open CapCut for PC
- Drag your clips to the timeline
Step 2: Add Motion Blur Effect
- Go to the “Effects” tab
- Search for “Motion Blur” or “Camera Motion Blur”
- Drag the effect onto your clip or overlay track
- Adjust settings:
- Strength: 20–50
- Angle: 0°–180° depending on movement direction
- Blend: 0.6–0.8 for realistic softness
Step 3: Keyframe Your Blur (Advanced)
For moving camera scenes:
- Add keyframes to your clip’s position or rotation
- Apply motion blur effect simultaneously
- Sync movement with beats for perfect cinematic rhythm
🎬 Pro Tip: Pair motion blur with CapCut’s “Zoom In” and “Spin” transitions for Hollywood-style shots.
🎞️ Best Scenes to Use Motion Blur In
| Scene Type | Why It Works |
|---|---|
| Travel Vlogs | Smooth panning shots look cinematic |
| Action Edits | Adds realism to fast movements |
| Dance Videos | Matches rhythm and flow |
| Gaming Montages | Enhances energy and transitions |
| Cinematic B-Roll | Softens camera movements beautifully |
🔧 Combine Motion Blur with Other Effects
For professional results, use motion blur alongside these:
- Speed Ramp – Creates dynamic motion bursts
- Lens Flare – Adds realism to fast pans
- Shake Transition – Looks smoother with blur
- Color Grading – Completes the cinematic look
💡 Example Combo:
Speed Ramp (0.5x) + Motion Blur (50%) + Warm LUT = Viral cinematic edit.
🧠 Troubleshooting Tips
- If your blur looks too strong → reduce intensity to 30–40
- For low-end devices → export in 60 FPS for smoother rendering
- Always preview before exporting — blur can look different depending on motion speed
📹 CapCut Motion Blur Templates
Want a quick shortcut? Try using CapCut’s motion blur templates:
Search inside the app for:
- “Cinematic Motion Blur Template”
- “Smooth Zoom Blur CapCut Template”
- “Velocity Motion Blur Effect”
These templates come with pre-set transitions and blur intensity — perfect for fast editing.


